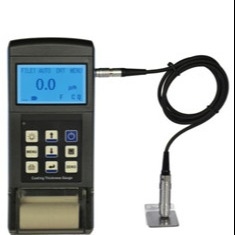
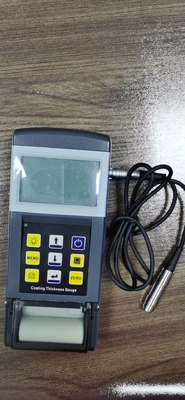
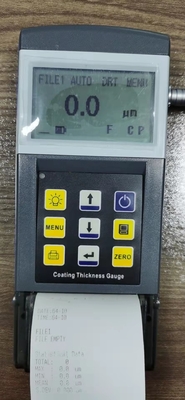
Inbuilt Printer Dry Film Paint Thickness Tester Elcometer Coating Thickness Gauge TG110
Applications:
The TG110 measures the thickness of non-magnetic materials (e.g. paint, plastic, porcelain enamel, copper, zinc, aluminium, chrome etc.) on magnetic materials (e.g. iron, nickle etc.) . often used to measure the thickness of galvanizing layer, lacquer layer, porcelain enamel layer, phosphide layer, copper tile, aluminium tile, some alloy tile, paper etc.
Features:
- With different external probes, the gauge can be applied to measuring thickness of non-magnetic coating on magnetic metal substrate, as well as non-conductive coating on non-magnetic metal substrate.
- Two measuring modes: single or continuous, changeable.
- Two work modes: direct or group, changeable.
- High precision mode: multiple measurements and automatically data filtering method to reduce disturbance of measure results
- Temperature compensation: compensate the measurement distortion caused by the drifting of temperature.
- Give five statistical values: average, maximum, minimum, measure number, and standard deviation.
- Two calibration methods can be applied to the gauge; And the system error of the probe can be corrected with the basic probe calibration method.
- Data storage: up to 500 measurements storage.
- Set boundary: alarm while measurements out of boundary.
- Battery information indicates the rest capacity of the battery.
- Beep prompting.
- Five statistical data:MEAN,MAX,MIN,NO.,S.DEV
- Auto power off function to conserve battery life.


Measuring Principles
The gauge adopts two thickness-measuring methods: magnetic induction method and eddy current method.
Magnetic Induction method: The probe and the magnetic metal substrate will form a closed magnetic circuit when probe contacting with the coating; the magnetic resistance of closed magnetic circuit varies due to the existing of non-magnetic coating. The thickness of the coating can be measured through the variation of magnetic resistance.
Eddy current method: The high frequency alternating current generates an electromagnetic field in the probe coil; eddy current will be formed on metal substrate when the probe contacting with the coating, and the eddy current has an effect of feedback on the coil in probe. The thickness of the coating can be calculated through measuring the effect of feedback.
The range of applications is indicated by the probes available.
-F probes work on the magnetic induction principle and should be used for non-magnetic coatings such as aluminum, chrome, copper, zinc, paint and varnish, enamel, rubber etc., on an iron or steel substrate; they are also suitable for alloyed and hardened magnetic steel.
- N probes work on the eddy-current principle and should be used for insulating coatings on all non-ferrous metals and on austenitic stainless steels, e.g. paint, anodizing coatings, ceramics, etc. applied on aluminum, copper, zinc die-casting, brass, etc.

Technical Parameters
Measuring range and Accuracy (see Appendix table 1)
Working environment
- Temperature:0℃~40℃
- Humidity:20%RH~90%RH
- Without strong magnetic field
Power
- 2*3.7V Rechargeable lithium batteries
Size and weight
Appendix table 1 Technical parameters
| Probe type | F | N |
| Measuring principle | Magnetic induction | Eddy current |
| Measuring range | 0~1500 um | 0~1500 um |
| Low range resolution | 0.1 um | 0.1 um |
| Accuracy | Zero calibration | ±(2%H+1) um | ±(2%H+1) um |
| Two point calibration | ±[(1~2)%H+1] um | ±[(1~2)%H+1] um |
| Measuring Condition | Min. radius of curvature | Cx. 1.5 mm | Cx. 3 mm |
| Min. radius of area | Φ7 mm | Φ5 mm |
| Critical thickness of plate | 0.5 mm | 0.3 mm |
Note: H – nominal value of thickness
Appendix table 2 Probe selection reference
Coating Plate | Non-magnetic Coating of Organic material (Such as: paint, enamel, plastic, anodizing, etc.) | Non-magnetic Coating of Nonferrous metal (Such as: Chromium, zinc, aluminum, copper, tin, silver, etc.) |
| Magnetic metal such as iron and steel | F type probe Measure range: 0μm~1500μm | F type probe Measure range: 0μm~1500μm |
| Nonferrous metal such as Copper, aluminum, brass, zinc, tin, etc. | N type probe Measure range: 0μm~1500μm | N type probe Measure range: 0μm~40μm (only for Chromium on Copper) |
Configuration
Table1-1 Configuration
| Item | Quantity | Remarks |
| Main Unit TG110 | 1 | |
| Probe | 1 | F or N or FN |
| Calibration Foils | 5 PCS | |
| Zero plate | 1 | Iron or Aluminum |
| Battery | 1 | CR123A, 3V |
| User Manual | 1 | |
| Certificate | 1 | |
| Warranty card | 1 | |
| Feedback submission | 1 | |

 Your message must be between 20-3,000 characters!
 Please check your E-mail!
  Your message must be between 20-3,000 characters!
 Please check your E-mail!


